Maya Technical Paper
Creating the rig
Unit 3: Transcription
Chris Rogers
Creating a
well designed rig was always going to be difficult for this character. There
are so many joints that needed to be sorted and created in a way that wouldn’t
cause a huge mess.
This is the
process of Rigging:
Step one:
Place a Joint (Animation>Skeleton>Joint Tool) in the centre/ waist area
this will act as the main joint/ Parent Joint


Step Three:
From the Chest_Jnt, branch out 24 new joints. Name them L_CLav_Jnt, L_Shoulder_Jnt,
L_Elbow_Jnt, L_Wrist_Jnt, Pinky_Jnt_01-04, Ring_Jnt_01-04, Middle_Jnt_01-04, Index_Jnt_01-04,
Thumb_Twist_A, Thumb_Twist_B, Thumb_Jnt_01, Thumb_Jnt_02.


Step Four:
Branching from Chest_Jnt, Spinal_01 and 02 create five more joints on each
branch. Name them Top_Finger_Jnt_01-05, Middle_Finger_Jnt_01-05,
Bottom_Finger_Jnt_01_05.
Step Five:
Mirror all the Left Joints over to the right.

Step Six:
Now create a joint and the base of the rock attached to the body and then one
joint at the top of every rock and then press enter. Select the chain you just
created, then select the Waist_Jnt and press P. Parent each rock to the joint
it is closest to.

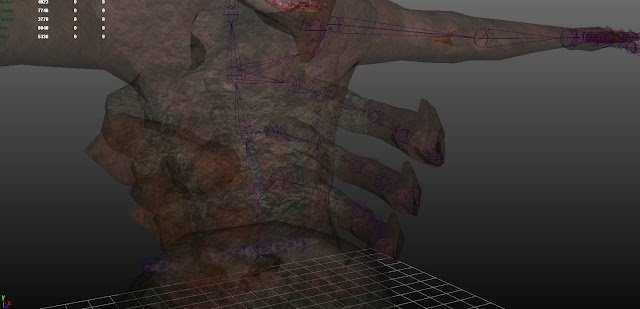
This the
what the rig looks like,

Step Seven:
Create a Nurbs Circle, Snap it to the Waist_jnt. Scale it to a descent size.
Select the Waist_Jnt and then the Nurbs Circle and press P. This has turned the
circle into a ctrl for the joint, this gives us the option to move this joint
around without going right into the model to find it.

Create
another Nurbs Circle and snap it to the Spinal_Jnt_01, this time open the Outliner,
Put the circle into the Waist joint and then put the Spinal_Jnt_01 into the
that Nurbs Circle. The Circle should now control the joint.
Continue
this process until you have controls on all joint expect the neck, head, Jaw
and hand joints. Like this –

No comments:
Post a Comment